

Since Angular2 RC2 introduced a complete new form modules(search @angular/forms in https://npmjs.com), it allow you use template driven form like Angular 1.x, it also support the programatic approach.
In the previous posts, we have create some components, and use HTTP client to fetch data from backend APIs. In this post, we will focus on form submission.
Add Post
new-post.component.ts:import { Component, OnInit, OnDestroy } from '@angular/core';
import { Router } from '@angular/router';
import { Subscription } from 'rxjs/Subscription';
import { Post } from '../core/post.model';
import { PostService } from '../core/post.service';
@Component({
selector: 'app-new-post',
templateUrl: './new-post.component.html',
styleUrls: ['./new-post.component.css']
})
export class NewPostComponent implements OnInit, OnDestroy {
data = { title: '', home: '' };
sub: Subscription;
constructor(private postService: PostService, private router: Router) { }
save() {
console.log('saving post data!' + this.data);
this.postService
.savePost(this.data)
.subscribe(res => {
this.router.navigate(['', 'posts']);
});
}
ngOnInit() {
}
ngOnDestroy() {
// if (this.sub) {
// this.sub.unsubscribe();
// }
}
}
PostService and Router. In save method, it calls PostService.save() to save post and then navigate to posts list page.Add the following content into new-post.component.html file.
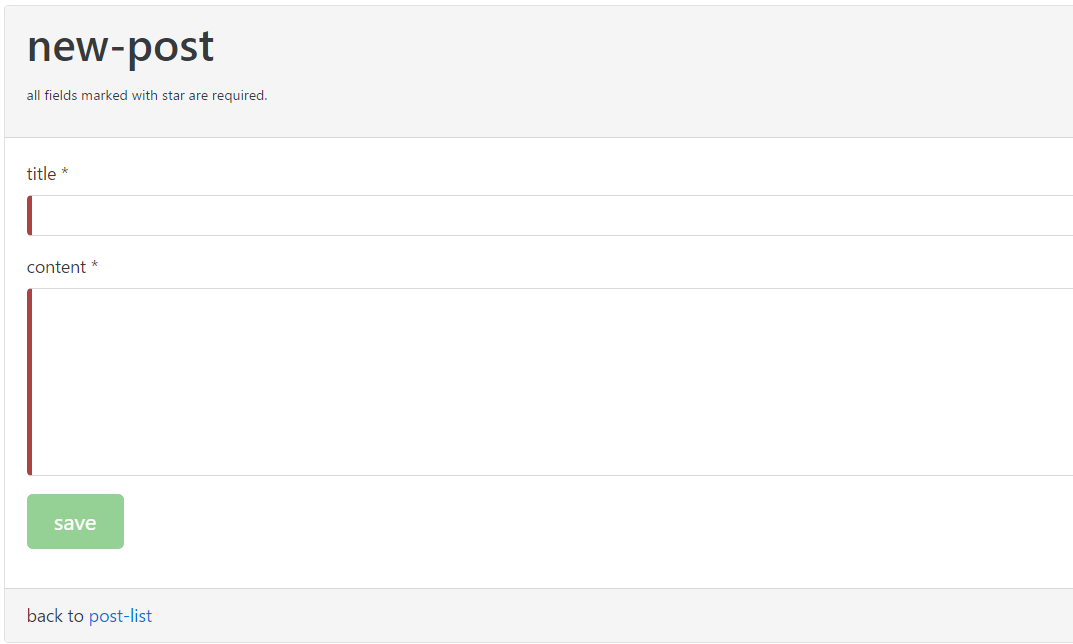
<div class="card">
  <div class="card-header">
    <h1 class="card-title">{{'new-post'}} </h1>
    <p><small>all fields marked with star are required.</small></p>
  </div>
  <div class="card-block">

    <form id="form" #f="ngForm" name="form" class="form" (ngSubmit)="save()" novalidate>

      <div class="form-group" [class.has-danger]="title.invalid && !title.pristine">
        <label class="form-control-label" for="title">{{'title'}} *</label>
        <input class="form-control" id="title" name="title" #title="ngModel" [(ngModel)]="data.title" required/>
        <div class="form-control-feedback" *ngIf="title.invalid && !title.pristine">
          <p *ngIf="title.errors.required">Post Title is required</p>
        </div>
      </div>

      <div class="form-group" [class.has-danger]="home.invalid && !home.pristine">
        <label class="form-control-label" for="home">{{'home'}} *</label>
        <textarea class="form-control" #home="ngModel" type="home" name="home" id="home" [(ngModel)]="data.home" rows="8" required
          minlength="10">
        </textarea>
        <div class="form-control-feedback" *ngIf="home.invalid && !home.pristine">
          <p *ngIf="home.errors.required">Post Home is required</p>
          <p *ngIf="home.errors.minlength">At least 10 chars</p>
        </div>
      </div>

      <div class="form-group">
        <button type="submit" class="btn btn-success btn-lg" [disabled]="f.invalid || f.pending">  {{'save'}}</button>
      </div>
    </form>
  </div>
  <div class="card-footer">
    back to <a [routerLink]="['','posts']">{{'post-list'}}</a>
  </div>
</div>
#f is a reference of NgForm directive, (ngSubmit) defines an output event handler. [(ngModel)] is the two-way binding property, it is default binding approach in AngularJS 1.x. Similar with AngularJS 1.x, there are some status value can be use for describing the status of form and form fields. such as valid and invalid, dirty and pristine, an form has extra pending and submitted status.
[class.has-danger] is an attribute directive to toggle CSS class. *ngIf is a structure directive, it will add or remove the hosted node according to the evalutated result of the applied expression. This form uses HTML5 compatible attributes(required, minlength etc) to set form validation, but it use Angular to valdiate.
title.errors, title is the reference of #title, a FormControl directive. .errors will store all validation errors of this field.To use form, you have to import
FormsModule....
import { FormsModule } from '@angular/forms';
...
@NgModule({
imports: [
CommonModule,
FormsModule,
...
})
export class PostsModule { }
Edit Post
Similar with the New post component. It is easy to complete the edit post page.edit-post.component.ts:
import { Component, OnInit, OnDestroy } from '@angular/core';
import { Router, ActivatedRoute } from '@angular/router';
import { Subscription } from 'rxjs/Subscription';
import { Post } from '../core/post.model';
import { PostService } from '../core/post.service';

@Component({
  selector: 'app-edit-post',
  templateUrl: './edit-post.component.html',
  styleUrls: ['./edit-post.component.css']
})
export class EditPostComponent implements OnInit, OnDestroy {
  data: Post = { title: '', home: '' };
  sub: Subscription;
  id: number;

  constructor(private postService: PostService, private router: Router, private route: ActivatedRoute) { }

  save() {
    let _body = { title: this.data.title, home: this.data.home };

    this.postService
      .updatePost(this.id, _body)
      .subscribe(res => this.router.navigate(['', 'posts']));
  }

  ngOnInit() {
    this.sub = this.route.params
      .flatMap(params => {
        this.id = +params['id'];
        return this.postService.getPost(this.id);
      })
      .subscribe((res: Post) => this.data = res);
  }

  ngOnDestroy() {
    this.sub.unsubscribe();
  }
}
id.edit-post.compponent.html:
<div class="card">
<div class="card-header">
<h1 class="card-title">{{'edit-post'}} </h1>
<p>created at: {{data.createdAt}} • {{data.createdBy}}</p>
<p><small>all fields marked with star are required.</small></p>
</div>
<div class="card-block">
<form id="form" #f="ngForm" name="form" class="form" (ngSubmit)="save()" novalidate>
<div class="form-group" [class.has-danger]="title.invalid && !title.pristine">
<label class="form-control-label" for="title">{{'title'}} *</label>
<input class="form-control" id="title" name="title" #title="ngModel" [(ngModel)]="data.title" required/>
<div class="form-control-feedback" *ngIf="title.invalid && !title.pristine">
<p *ngIf="title.errors.required">Post Title is required</p>
</div>
</div>
<div class="form-group" [class.has-danger]="home.invalid && !home.pristine">
<label class="form-control-label" for="home">{{'home'}} *</label>
<textarea class="form-control" #home="ngModel" type="home" name="home" id="home" [(ngModel)]="data.home" rows="8" required
minlength="10">
</textarea>
<div class="form-control-feedback" *ngIf="home.invalid && !home.pristine">
<p *ngIf="home.errors.required">Post Home is required</p>
<p *ngIf="home.errors.minlength">At least 10 chars</p>
</div>
</div>
<div class="form-group">
<button type="submit" class="btn btn-success btn-lg" [disabled]="f.invalid || f.pending"> {{'save'}}</button>
</div>
</form>
</div>
<div class="card-footer">
back to <a [routerLink]="['','posts']">{{'post-list'}}</a>
</div>
</div>
createdAt and createdBy below the post title.ReactiveForms
We have used template driven forms in add ang edit post components, it is stupid and simple and very similar with AnguarJS 1.x.Let have a look at template version of the search bar in posts component.
  q:string='';


  search() {
    this.sub = this.postService.getPosts({ q: this.q }).subscribe(
      res => this.posts = res
    );
  }
<form class="form-inline">
  <div class="form-group" (ngSubmit)="search()">
    <input type="text" name="q" class="form-control" [(ngModel)]="q" />
  </div>
  <button type="submit" class="btn btn-outline-info">{{'search'}}</button>
</form>
search method. Alternatively, we can use #xyz to refer the input box and get the user input value. <form class="form-inline">
<div class="form-group" (ngSubmit)="search(term.value)">
<input type="text" name="q" class="form-control" #term />
</div>
<button type="submit" class="btn btn-outline-info">{{'search'}}</button>
</form>
  search(term:string) {
    this.sub = this.postService.getPosts({ q: term }).subscribe(
      res => this.posts = res
    );
  }
The simplest way is adding a keyup output binding to
search method.<form class="form-inline">
<div class="form-group" (ngSubmit)="search(term.value)">
<input type="text" name="q" class="form-control" #term (keyup)="search(term.value)"/>
</div>
<button type="submit" class="btn btn-outline-info">{{'search'}}</button>
</form>
ReactiveForms.Import it in
PostsModule....
import { FormsModule, ReactiveForms } from '@angular/forms';
...
@NgModule({
imports: [
CommonModule,
FormsModule,
ReactiveForms
...
})
export class PostsModule { }
import {FormCtrol} from '@angular/forms';

q:FormCtrol;

constructor(){
this.q.valueChanges
       .debounceTime(500)
       .distinctUntilChanged()
       .flatMap(term => this.postService.getPosts({ q: term }))
       .subscribe((res: Array<Post>) => this.posts = res);
}
debounceTime accepts 500 ms to delay to process, and distinctUntilChanged() use avoid duplicated request using the same search term. flatMap will concat PostService.getPosts into the first stream and use it as successor in the Observerable flow.The template can be more simple, eg.
<form class="form-inline">
  <div class="form-group" ">
    <input type="text" name="q" class="form-control" [formCtrol]="q"/>
  </div>
  <button type="submit" class="btn btn-outline-info">{{'search'}}</button>
</form>

0 comments: