Hello world. Today i will show you how create first android apps / application with android studio. Now i am use mac operating system for develop apps. Basically create android apps its so easy if you have basic programming language, for specifically Java Programming. I suppose you if you want to develop android apps, please use android studio, latest update SDK. If you have everything like that it can help you to develop android apps something like reduse minimum issue, beautiful design, and know news update about android. Yoyoy we can start now step by step.
1. Install Latest Java JDK Version
You can download here in oracle. I suppose you to download and install latest version because we can reduce minimum issue for android studio and support for android studio work fine.
2. Install Android Studio Version
You can download android studio here in developer android studio. Again i suppose you to download and install because we can reduce issue (android studio its still young), make beautiful design and develop android app with last operating system. You can follow step by step to install whenever in mac, windows and linux in there.
3. Install Last SDK
In the third step you can install all sdk in android studio. Pick Configure > SDK Manager > Launch Standalone SDK Manager, and install everything in there if you want easy to develop android apps, no more issue. After that your ready to develop android apps.
3. Hello World Project
Open you android studio and pick start a new Android Studio Project.
 |
| First Screen Android Studio Menu |
First Screen write your application name. Pick Location that you want save your android project. Click next
 |
| Write Android App Name |
Second screen just pick minimum sdk (its minimum os android for your android apps). After that you can choose version that you want to develop whenever in Phone and Tablet, Wear, Tv, Android Auto, Glass. Click next.
 |
| Choose Target Android App |
Third screen you can pick layout whenever its basic activity, empty activity etc. In this post i will choose empty activity. And then click next.
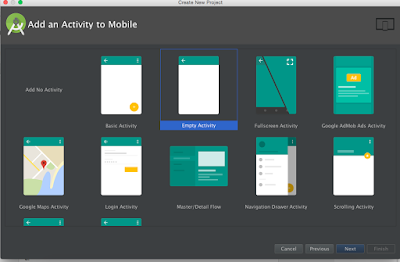 |
| Choose App Template Screen |
Fourth screen just let all default, click finish, and wait. Its just name for java file and xml file. i will guide to learn structure about android project.
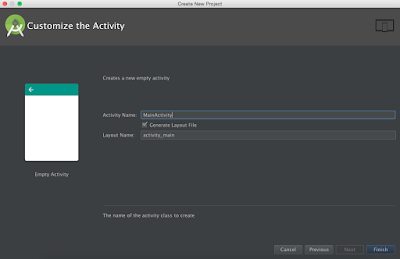 |
| Write Name Java Xml File |
Now you can run your android project. But before we run project i will set user interface android so we can understand so easily about structure android project. Pick android and choose project.
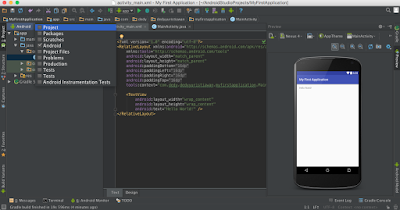 |
| Change Project UI Screen |
and stucture android project will be like that.
 |
| Project UI Easy to Undersatand |
In java folder its for we write java code and logically android project runs. File MainActivity.java its for runs xml file look this code.
setContentView(R.layout.activity_main);
Move to xml file, you can move to res folder > layout > activity_main.xml. Look from the top from default xml had relative layout and text view. Textview its for show with text 'Hello World' in screen android, you can look in preview screen
android:text="Hello World!"
 |
| Xml Hello World |
There is another folder that you can use its drawable folder. In this folder you can put image, xml file and etc i will tell you more in next post.
Mipmap folder its for image for with different dimension to fix screen in android phone. For example default its ic_launcher.png its a logo android app. You can look when android project run.
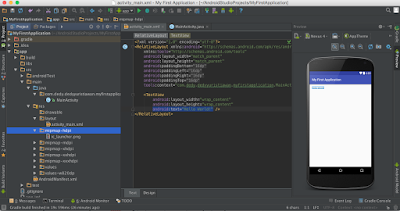 |
| Mipmap Folder |
Values folder its for you to set color, string (text), dimes (dimension), and style (usually its for theme android apps)
 |
| Values Folder |
The important file its AndroidManifest.xml its for manage your activity, theme, and name of android apps. see and understand it. There another file that important in android project is a build.gradle file. This file if want to use library in folder or web, so android studio can automatically add library if you put link in dependency code.
dependencies {
    compile fileTree(dir: 'libs', include: ['*.jar'])
    testCompile 'junit:junit:4.12'
    compile 'com.android.support:appcompat-v7:23.4.0'
}
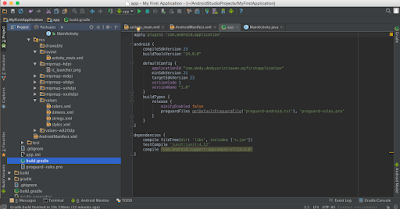 |
| Build.Gradle File |
if you want to use library android just put bellow compile 'com.android.support:appcompat-v7:23.4.0' and click sync, android will automatically add library in you android project.
So if you understand with all of that we can run android project or you can write comment in bellow. Before you want run android project android studio you must create android virtual device with this step :
Click button run app (green triangle in top) >
Create emulator > choose phone that you want > next >
Choose os android (i suppose you to choose os with ABI x86, because it can help emulator run fast) > next >
Write your avd name > finish > wait >
Choose adv that you created > click ok and emulator android will be show.


0 comments: